All Categories
Featured
Table of Contents
- – Cargo Trailer Repair Chino Hills, CA
- – OCRV Center
- – Trailer Restoration Chino Hills, CA
- – 5th Wheel Repair Near Me Chino Hills, CA
- – Trailer Roof Repair Chino Hills, CA
- – Travel Trailer Window Replacement Chino Hills...
- – Camping Trailer Repair Near Me Chino Hills, CA
- – Trailer Window Replacement Chino Hills, CA
- – Travel Trailer Repairs Chino Hills, CA
- – Travel Trailer Service Chino Hills, CA
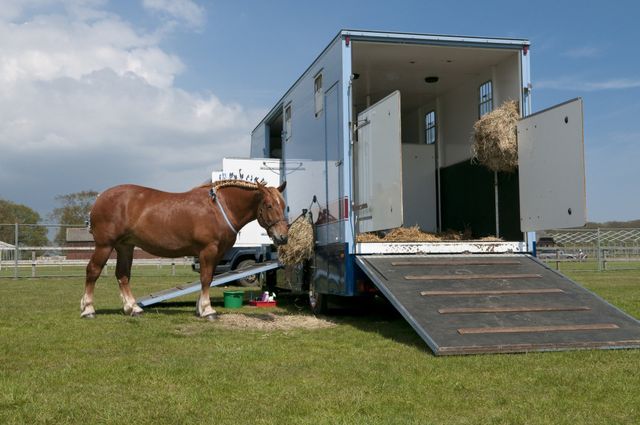
- – Horse Trailer Repairs Chino Hills, CA
- – Rv Trailer Repair Shops Near Me Chino Hills, CA
- – Rv Trailer Repair Shop Chino Hills, CA
- – OCRV Center
Cargo Trailer Repair Chino Hills, CA
The even more you utilize your trailer, the more it's important to preserve your slide. Our team will certainly inspect for appropriate securing, procedure and lubrication to keep it in working order.
Regular upkeep prolongs your trailer's efficiency, preventing a requirement to change it sooner. Savvy proprietors like you regularly select Large Tex Trailer Globe as their partner for equine and cattle trailer services because: We have locations across the United States with the solutions and knowledge you can trust.
Equine At Turnbow Trailers in Oklahoma, we boast of our background. Years of difficult job have actually gone right into making this business and the custom-made trailers we generate the very best in the country today. Carl and Elegance Turnbow began Turnbow Trailers in 1960, armed with absolutely nothing greater than a little cash money, great deals of intestines and a desire.
Trailer Restoration Chino Hills, CA
Carl and Poise are both in the office everyday, looking after the operation and making certain things are done right. Many everybody right here is an expert of the trailer organization and 90 percent of our people have actually been below for one decade or more. It's this commitment and devotion to our craft that assists us end up the sort of steed trailers we make.

We are constantly altering and boosting our trailers to meet the demands these days's demanding equine sector. We such as to think we're big enough to fulfill all your trailer requires, yet small sufficient to offer each client the individual focus they are worthy of. When you get a Turnbow Trailer, you can feel confident that you have actually gotten the very best trailer at the very best price offered today.
5th Wheel Repair Near Me Chino Hills, CA
Second, our group has comprehensive RV repair work and trailer upkeep knowledge and know-how. Third, we specialize in searching for and mounting the best devices for your vehicle, guaranteeing you're well-equipped for your following journey.

Boespflug Trailers has actually been a family-owned and operated company considering that 1983 with generations of experience. In 1997 a bigger center was created with consumer requires in mind to allow increased sales and solution chances.
You can trust our service experience for several years to find with our trustworthy solution technicians and considerable parts stock. You can select from our in-stock trailer stock or unique order a customized device to your specifications. To make sure the very best worth for you, we make every effort to equip just product that supply high quality, longevity, and value.
Our solution store provides professional, prompt repair services or manufacture on the majority of trailers up to 30,000 # GAWR, including motor home's. We also install hitches on tow lorries. We have transportation specialists to guarantee quick, damage-free delivery of your unit. We can supply throughout the USA (reduced 48 and Alaska) and Canada.
Trailer Roof Repair Chino Hills, CA
When you're spent in making certain your trailer remain in magnum opus order for years to find, you require knowledge and ability you can count on. Our very educated technicians are committed to keeping and servicing your Kingston Trailers, 4 Celebrity Trailers, Hawk Trailers You can get the most out of your purchase - Chino Hills Rv Trailer Repair Shops Near Me.
This labor intensive solution removes ugly black touches and other pollutes from your trailers repaint. Deep tidy the interior of your equine trailer to remove accumulated contaminates and odors. * Prices for all services depends on the size and condition of trailer * We are pleased to supply quality service in the Pottstown area.
It is with wonderful enjoyment that we present to you our hand-picked array of items that have come to be an essential component of our service.
When you're bought making certain your trailer, such as a cars and truck hauler, dump, confined, or energy trailer remains in wonderful functioning order for years to find, you need expertise and ability you can trust. Our highly educated service technicians are dedicated to keeping and servicing your trailer so you can get the most out of your purchase.
Travel Trailer Window Replacement Chino Hills, CA
Reliability is important when there's a job to do and we have the tools and experience to obtain your trailer back when traveling. Provide us a call and we'll get you in and out of the store in an efficient and prompt way. Jimmy's Vehicle Repair & Trailer Supply is pleased to give quality solution near the locations of Culpeper, Fredericksburg, Warrenton, Manassas, and Fairfax.
Do not be fooled right into assuming your neighborhood gas station is a trailer specialist. Equine trailers are what we do and our factory trained auto mechanics specialize in completing maker advised yearly trailer service.
Axle manufactures recommend that brakes be serviced every year. Our annual solution package includes full cleansing, inspecting and repacking the bearings, changing the seals and cotter pins or tang washing machines. Cleaning, lubing and changing the brakes. Likewise included is complete inspection of the axles, structure, flooring, doors and ramp. The breakaway system is tested along with all electrical elements.
All moving components are lubricated. Keeping your trailer properly serviced keeps you and your steeds secure. All makes and versions of trucks and trailersAnnual preventative upkeep for equine trailersB & W gooseneck hitches, structure tow hitches installedBrake control installment and vehicle wiring for all makes and modelsAll kinds of electrical fixing and serviceSteel and aluminum construction for all sorts of trailersWeight distributing hitchesPre-purchase security checks.
Camping Trailer Repair Near Me Chino Hills, CA
When it involves carrying heavy loads, you require a energy or cargo trailer tough adequate to stand up to the pressures of nature and your kind of work. At Drawback King, we are your ONE-STOP purchase all points trailer associated in New york city, NY. Not just do we offer energy trailers offer for sale, however we additionally provide trailer fixings.
Whether utilizing an energy trailer for service or individual usage, it is very important to remain current on maintenance. Trailers, tow hitches, and so on come in all shapes and sizes, so you constantly wish to have a professional double-check compatibility along with all electric and safety and security features prior to every load.
See to it to inspect out our current specials and frequently asked concerns prior to you phone call to conserve you money and time. We also use moving vehicle leasings and moving products. From minor problems to major job, Drawback King's trailer repair service solutions will certainly keep you roadworthy and your cargo safe. Our experts function hard since we understand you do, as well.
For a free price quote on any solution at our area in New York City City, provide the Drawback Pros a call today at, or request a quote online now.
Trailer Window Replacement Chino Hills, CA
If you have actually ever been to our shop, you will quickly see that equine trailers are our specialty. We created an one-of-a-kind bond with numerous customers over the years who return every year to guarantee they have a safe trailer prior to they transfer any of their horses. Much of our on-site solutions are done at equine barns.
Many horse proprietors simply desire us to execute a safety and security check. They want to know their trailer is secure for their beloved horses since let's encounter it, some individuals like their horses even more than they such as individuals.
Travel Trailer Repairs Chino Hills, CA
Anything from kicking a door to peing on the flooring boards creating moisture between the floor covering and the timber. We change a great deal of wood floors guaranteeing the architectural integrity of the trailer and a secure trip for the horses. We likewise do a lot of hot pressure washing of the inside and beyond equine trailers.
We are a family-run organization and we employ our employees with the same honesty and sectarian mentality as the owner. We also pressure cleaned the within of a horse barn.
Travel Trailer Service Chino Hills, CA
"I put a whole lot of miles on my horse trailer going to programs around the nation. Shawn and his group provide routine maintenance and have never ever up-sold me to something I didn't need. They are likewise not stuck on a 9-5 schedule. I have actually gone down and grabbed my trailer when it was hassle-free to me." Trudy Midas, EspanaSilk "We traverse 12,000 miles per year with our LQ equine trailer and there's literally no other way we might do it without Shawn's help.
As a woman that frequently travels alone cross nation with my kids and steeds, having Shawn and his crew at ALL-MAC keep and fix my gear gives me (and my spouse) the self-confidence I require to hit the trail and recognize we will certainly be risk-free. The lower line is that Shawn and his team are the very best and I very recommend them!" Kristy Gusick "The comfort your company offers me is invaluable" Sarah Hoban "We align our trailers and All Mac invests the day doing what would take us days if he needed to move every one of our trailers to an additional area to get dealt with.
When you're purchased making certain your trailer remain in magnum opus order for years to come, you require expertise and skill you can rely on. Our very trained technicians are devoted to keeping and servicing your Kingston Trailers, 4 Star Trailers, Hawk Trailers so you can get the most out of your acquisition.
Horse Trailer Repairs Chino Hills, CA
This labor extensive service removes unsightly black touches and various other infects from your trailers repaint. Chino Hills Rv Trailer Repair Shops Near Me. Deep clean the interior of your horse trailer to remove developed contaminates and smells. * Pricing for all services depends upon the size and condition of trailer * We are honored to provide high quality solution in the Pottstown area
Offering Farmington Hills, Farmington, Novi, Livonia, Northville Since 1958 When it comes to your steeds, safety and security always comes. Before you fill your horses into the trailer, make sure to link and carry out a brief assessment of the tires and lights. Keep a tire gauge handy and examine that the tire is holding the proper stress (referred to as PSI).
Dry rot can happen also if the tire step still looks excellent, and when those splits appear, your tire becomes endangered. And once again, bear in mind to evaluate your extra tires also. Because of completely dry rot, you should intend on changing tires every three to five years no matter appearance. Always check the pressure when the tires are chilly.
Rv Trailer Repair Shops Near Me Chino Hills, CA
The proper pressure for your horse trailer tires is situated right on the tires. Equine trailers require specific tires, largely due to the fact that of the load they're lugging.
Just like any type of road car, your steed trailer is mosting likely to require and periodic repair service to maintain it carrying out at its ideal. Lots of horse trailer proprietors are not sure exactly how to appropriately look after their trailer, so we have actually produced this overview to aid with some common problems. Always refer to the owner's handbook for specific details regarding your trailer model.
Rv Trailer Repair Shop Chino Hills, CA
OCRV Center
Address: 23281 La Palma Ave Yorba Linda, CA 92887Phone: (714) 909-1444
Email: art@ocrvcenter.com
OCRV Center
If you are a useful person, it might be alluring to work on a steed trailer on your own at home. We strongly advise that you let a qualified professional execute any type of fixing or upgrade work on your trailer. First off, an expert will certainly see to it that the work is done appropriately with no damages to your trailer.
Fifth Wheel Repair Near Me Chino Hills, CATravel Trailer Floor Repair Chino Hills, CA
Travel Trailer Replacement Windows Chino Hills, CA
Rv Trailer Repair Shop Chino Hills, CA
Camper Floor Repair Near Me Chino Hills, CA
5th Wheel Repair Near Me Chino Hills, CA
Fifth Wheel Service Chino Hills, CA
Travel Trailer Service Chino Hills, CA
Horse Trailer Repairs Chino Hills, CA
Travel Trailer Repairs Chino Hills, CA
Travel Trailer Service Chino Hills, CA
Rv Trailer Repair Near Me Chino Hills, CA
Trailer Window Replacement Chino Hills, CA
Trailer Floor Repair Chino Hills, CA
Trailer Roof Repair Chino Hills, CA
Rv Trailer Service Near Me Chino Hills, CA
Fifth Wheel Service Chino Hills, CA
Rv Trailer Repair Shop Chino Hills, CA
Rv Trailer Repair Shops Near Me Chino Hills, CA
Travel Trailer Ceiling Repair Chino Hills, CA
Horse Trailer Repair Near Me Chino Hills, CA
Trailer Window Replacement Chino Hills, CA
Travel Trailer Repairs Chino Hills, CA
5th Wheel Repair Near Me Chino Hills, CA
Cargo Trailer Repair Chino Hills, CA
Rv Trailer Repair Shops Near Me Chino Hills, CA
Rv Trailer Repair Shops Near Me Chino Hills, CA
Travel Trailer Window Replacement Chino Hills, CA
Fifth Wheel Service Chino Hills, CA
Rv Trailer Repair Shops Near Me Chino Hills, CA
Travel Trailer Floor Repair Chino Hills, CA
Rv Trailer Service Near Me Chino Hills, CA
Rv Travel Trailer Repair Near Me Chino Hills, CA
Travel Trailer Repairs Chino Hills, CA
Cargo Trailer Repair Chino Hills, CA
Travel Trailer Window Replacement Chino Hills, CA
Horse Trailer Repairs Chino Hills, CA
Rv Trailer Repair Shop Chino Hills, CA
Travel Trailer Siding Repair Chino Hills, CA
Fifth Wheel Repair Near Me Chino Hills, CA
Rv Travel Trailer Repair Near Me Chino Hills, CA
Fifth Wheel Repair Near Me Chino Hills, CA
Trailer Restoration Chino Hills, CA
Rv Travel Trailer Repair Near Me Chino Hills, CA
Travel Trailer Replacement Windows Chino Hills, CA
Rv Trailer Service Near Me Chino Hills, CA
Travel Trailer Service Chino Hills, CA
Travel Trailer Repairs Chino Hills, CA
Trailer Window Replacement Chino Hills, CA
Travel Trailer Siding Repair Chino Hills, CA
Trailer Floor Repair Chino Hills, CA
Rv Trailer Repair Near Me Chino Hills, CA
Trailer Restoration Chino Hills, CA
Travel Trailer Window Replacement Chino Hills, CA
Travel Trailer Awning Replacement Chino Hills, CA
Camping Trailer Repair Near Me Chino Hills, CA
Cargo Trailer Repair Chino Hills, CA
Travel Trailer Awning Replacement Chino Hills, CA
Travel Trailer Service Chino Hills, CA
Fifth Wheel Repair Near Me Chino Hills, CA
5th Wheel Repair Near Me Chino Hills, CA
Travel Trailer Repairs Chino Hills, CA
Trailer Floor Repair Chino Hills, CA
Trailer Floor Repair Chino Hills, CA
Rv Trailer Repair Shops Near Me Chino Hills, CA
Trailer Restoration Chino Hills, CA
Horse Trailer Repairs Chino Hills, CA
Travel Trailer Awning Replacement Chino Hills, CA
Cargo Trailer Repair Chino Hills, CA
Trailer Roof Repair Chino Hills, CA
Rv Travel Trailer Repair Near Me Chino Hills, CA
Rv Trailer Service Near Me Chino Hills, CA
5th Wheel Repair Near Me Chino Hills, CA
Trailer Restoration Chino Hills, CA
Rv Trailer Repair Near Me Chino Hills, CA
Rv Trailer Repair Shop Chino Hills, CA
Camper Trailer Service Chino Hills, CA
Travel Trailer Roof Replacement Chino Hills, CA
Finding A Seo Optimization Chino Hills, CA
Near Seo Firm Chino Hills, CA
OCRV Center
Table of Contents
- – Cargo Trailer Repair Chino Hills, CA
- – OCRV Center
- – Trailer Restoration Chino Hills, CA
- – 5th Wheel Repair Near Me Chino Hills, CA
- – Trailer Roof Repair Chino Hills, CA
- – Travel Trailer Window Replacement Chino Hills...
- – Camping Trailer Repair Near Me Chino Hills, CA
- – Trailer Window Replacement Chino Hills, CA
- – Travel Trailer Repairs Chino Hills, CA
- – Travel Trailer Service Chino Hills, CA
- – Horse Trailer Repairs Chino Hills, CA
- – Rv Trailer Repair Shops Near Me Chino Hills, CA
- – Rv Trailer Repair Shop Chino Hills, CA
- – OCRV Center
Latest Posts
Atwood Rubber Roofing For Campers
Chino Repair Rv Roof
Rv Windshield Repair Near Me West Covina
More
Latest Posts
Atwood Rubber Roofing For Campers
Chino Repair Rv Roof
Rv Windshield Repair Near Me West Covina